Archive for December, 2012
How to set up your email account in Windows Mail
Dec 12 13
The following instructions are for setting up a new email account in Windows Live Mail.
1. On the top navigation panel, click on ‘Accounts’ and then click on the Plus sign to add a new account.
Then enter your email address ans password and tick the box which says ‘Manually Configure Server Settings’ and then click ‘Next’
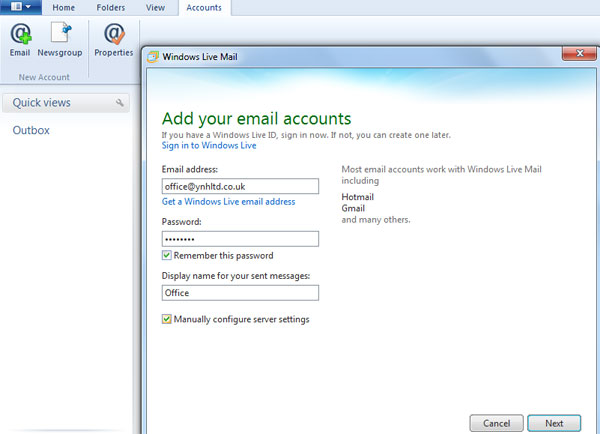
2. Choose pop or imap and enter the incoming mailserver details which will be mail.yourdomainname.co.uk (obviously replace yourdomainname.co.uk with your actual domain name).
The username will be the full email address you are setting up and the password will be the same password you set up for the mailbox in your control panel.
You can also refer to your confirmation email for further details on setting up emails in your control panel.
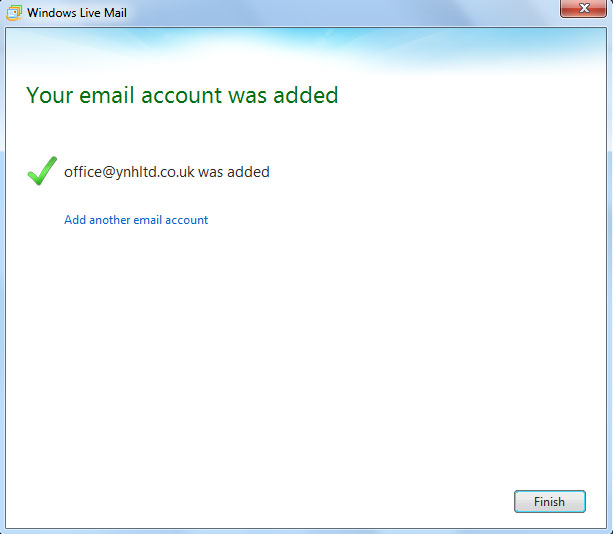
3. The account is now added, but to be able to send emails you need to ‘authenticate’ the Outgoing Mailserver.
Go the the ‘Properties’ section then click on ‘Servers’ and tick the box which says ‘My outgoing server requires authentication’ then click on the ‘Settings’ button.
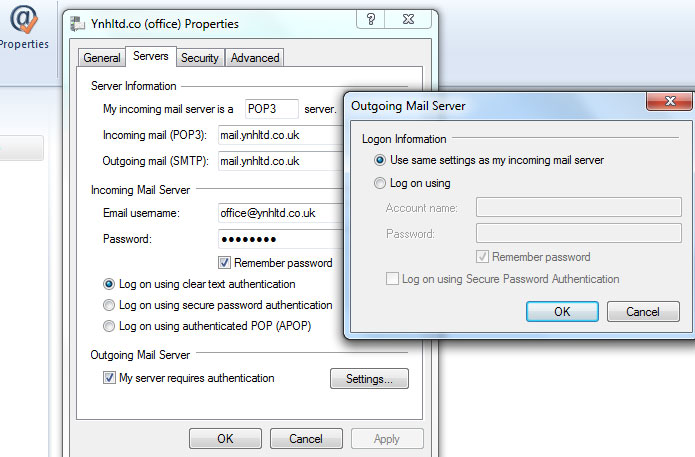
Tick the box which says ‘Use same settings as incoming mailserver’ and click ok.
The account is then set up and ready to send and receive emails.
How to send and receive your domain emails using Gmail servers.
Dec 12 10
 A Gmail account is very easy to set up and can also be used to send and receive your domain name’s emails.
This is a very handy freebie which can come in very useful for people who are having problems sending emails using their Internet Provider.
They also allow a huge 8GB of storage space for your account. This will be particularly appealing for users with IMAP accounts, whereby all the emails you send and receive are stored on the server and this does require a lot of space.
The instructions for setting up your domain name emails in Gmail are as follows:
1. If you do not have one already, sign up for a Gmail account here
2. Once you are signed up, go to your homepage/inbox and click on the ‘Settings’ section in the top right of the screen.
3. Click on ‘Accounts and Import’ and then click on ‘Add another email address you own’
4. Enter your email address and then choose the ‘Send through Gmail’ option.
5. You will then be prompted to send verification to your email address to confirm you are the owner. Once you receive the email follow the instructions.
6. Then go back to ‘Settings’ section and your email address will be listed as an alternative to your Gmail one.
7. Click on the ‘Make Default’ button to make this your standard email address.
Pointing your domain’s mail records to Google
Each domain name has ‘DNS records’ which tell the Internet which web servers handle your website and emails. When you set up your mail with Google, you then have to modify your ‘MX Records’ to let the Internet know that Google will be handling your mail.
To do this you need to login to your Control Panel and go to the DNS section.
Then highlight your existing MX records and click on ‘Remove’
Then you need to add the following records:
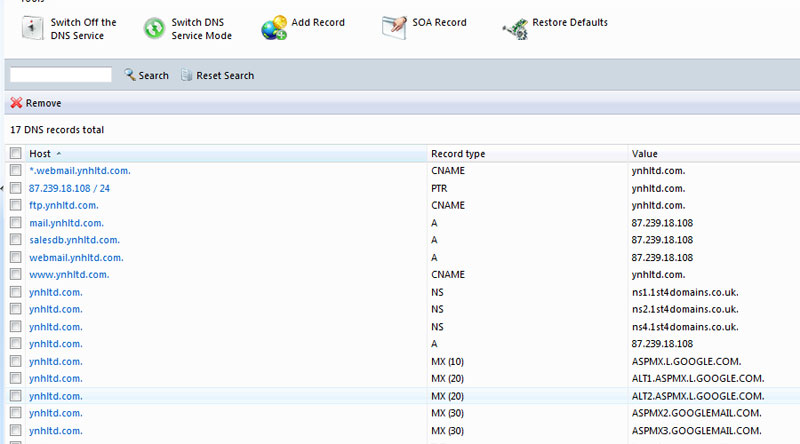
The above MX records will point your emails to Google so that their mailservers can handle your emails.
For a full explanation of how DNS records work please visit the following page:
http://www.your-name-here.co.uk/blog/2013/01/28/dns-records-explained/
